


Development in the VPN space has been quite static for a long time. Cisco VPN and Openvpn remain two of the most popular options. I’d like to introduce an alternative today.
I’ve been using Tailscale for years now, first for my personal network, then at work. The Tailscale team struggles to frame their product simply. I’d define it as a security, networking, and connectivity tool that helps create secure and performant mesh networks. Still, no single definition can capture how powerful this software truly is.
Tailscale is mostly open source but its control server remains proprietary. If that’s a dealbreaker for you, consider Headscale, an open source version of the Tailscale control plane.
I wanted to explore how Tailscale behaves in VPN mode and whether it could replace our traditional VPN solution.
The setup is straightforward. Build a couple of machines with proper hardware, connect them to your physical network and then to your Tailnet.
Users can connect directly (assuming they have the right permissions) to other nodes in the tailnet via Wireguard connections - the ideal scenario. For devices outside the tailnet, you can use subnet routers. Nodes flagged as subnet routers will route traffic from the Wireguard interface to other interfaces as needed. Again, you control access through Tailscale’s access controls.
With this setup, your users only send traffic over Tailscale when accessing resources in your network instead of routing all traffic through it. They can route everything if they wish via exit nodes.
Additionally, subnet routers work in HA mode. You just need to expose the same hosts or subnets with multiple devices connected to your tailnet.
Now let’s make some hardware decisions.
I want to configure machines to act as subnet routers. Here are the features I want:
We don’t need extensive computational resources - just decent CPU power and a good NIC to route traffic. Though Tailscale provides HA, I still want robust hardware that lasts.
1G would probably suffice, but since we have access to 10G switches, we might as well take advantage of them.
I want to remotely control the machine - reinstalling the OS and power cycling it when necessary.
Here’s what I selected:
We could have wired the ATX jumpers from the motherboard to the Pi-KVM to power cycle the machine directly. Unfortunately, I couldn’t access those pins, which is why we have the extra Pi 4 and IoT relay.
The NUC 9 is overkill but very well-made. It’s affordable because it’s an older version yet more than capable for our task.
The Pi-KVM gives us full KVM capabilities, allowing remote control of the NUC. Though Pi-KVM has ATX features for power cycling, I couldn’t access the necessary pins - hence the Pi 4 and IoT relay. The Raspberry Pi controls the relay, letting us power cycle the NUC remotely.
That’s all we need, for around $1000 total.
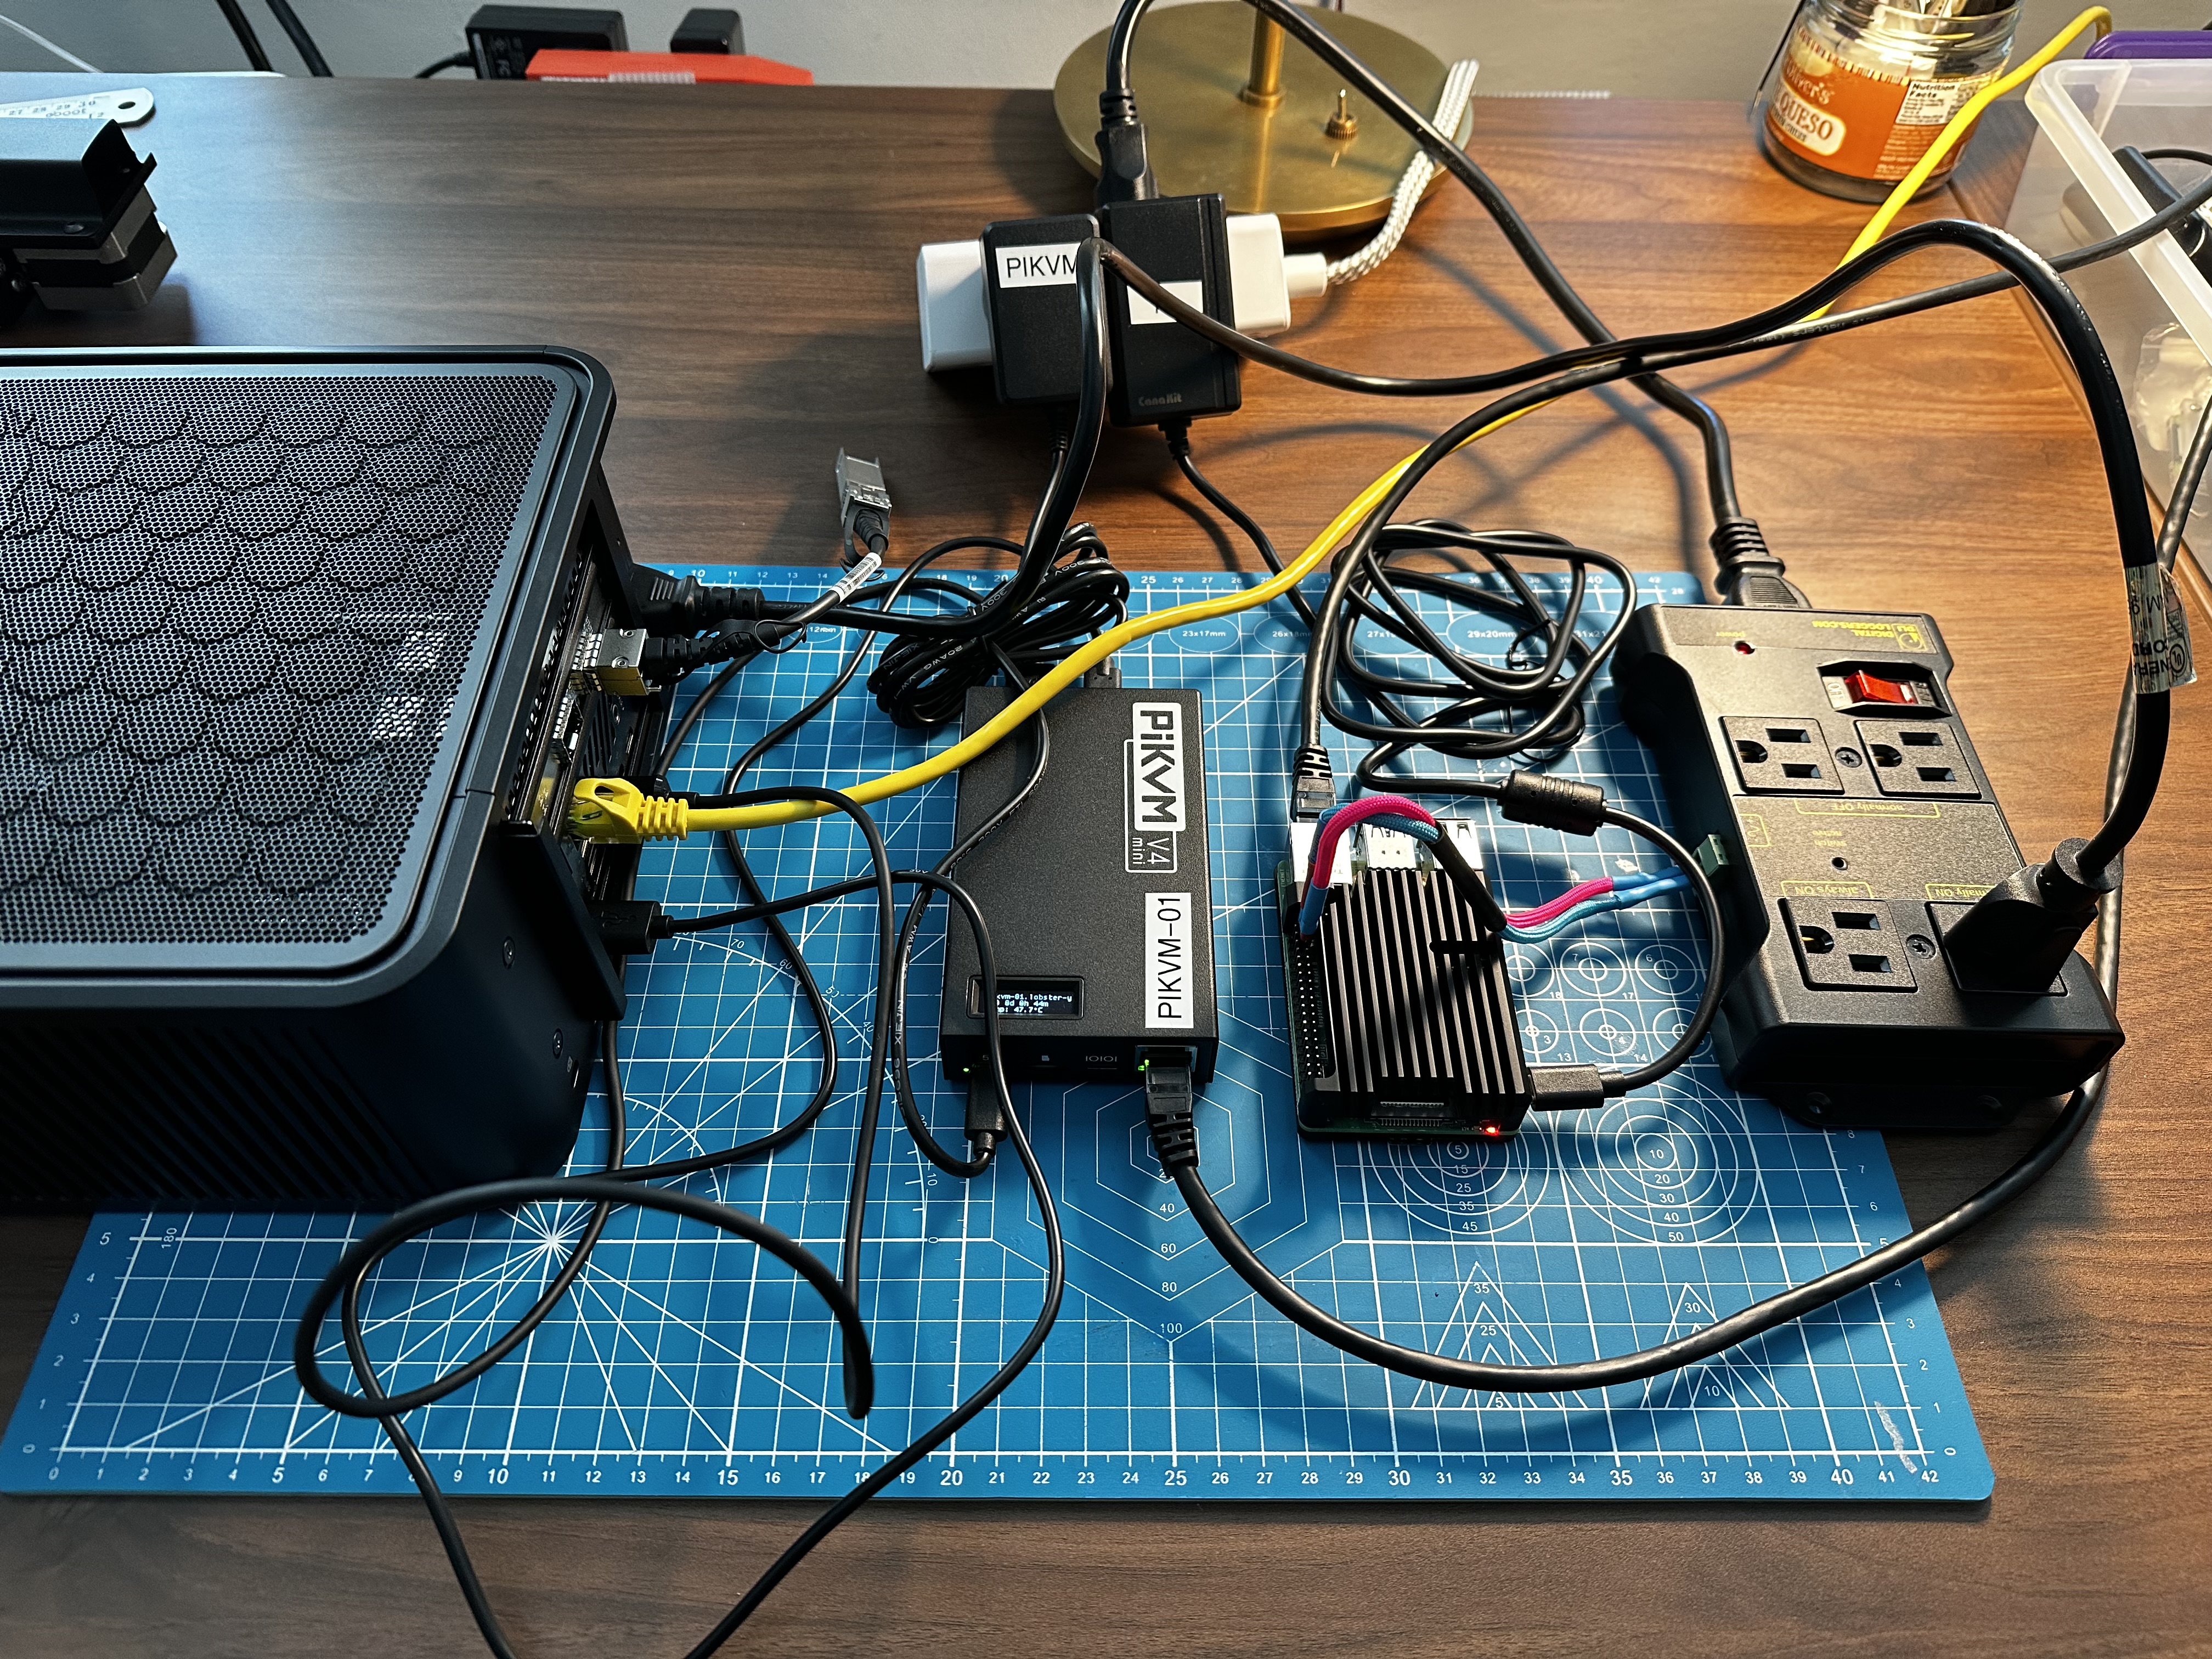
All the components of our Tailscale VPN solution
First, flash the Pi with Raspbian OS - preferably the lite version. After flashing, install Tailscale. Consider disabling key expiration and tagging the machine to control access from your policy file. Exit your SSH session and reconnect using Tailscale’s IP address or hostname. To allow traffic only on the Tailscale interface, run:
sudo apt install ufw
sudo ufw allow in on Tailscale0
sudo ufw default deny incoming
sudo ufw default allow outgoing
sudo ufw enable
Next, wire the GPIO pins to the relay and test that you can control it:
# Here I am using GPI26
cat /sys/kernel/debug/gpio  | grep GPIO26
gpio-538 (GPIO26              )
p=538
cd /sys/class/gpio
echo $p > export
cd gpio$p
echo out > direction
# power cycle
echo 1 > value ; sleep 1; echo 0 > value
Now for the Pi-KVM: flash the SD card and follow the first steps instructions. Change the root SSH password and UI password. Allow traffic only on the Tailscale interface:
rw
pacman -S ufw
systemctl start ufw.service
systemctl enable ufw.service
sudo ufw allow in on Tailscale0
sudo ufw default deny incoming
sudo ufw default allow outgoing
sudo ufw enable
ro
Plug your PC (HDMI and USB) into the Pi-KVM and verify you can control it remotely. Make sure you can access the BIOS. Update the BIOS to ensure the computer starts automatically after a power failure.
Install your OS of choice on the NUC and the setup is complete.
Once both machines are running and joined to your tailnet, consider installing node_exporter to capture performance metrics. I’ll write a separate post about this.
A follow-up post will be needed to assess Tailscale’s performance with this setup, but I don’t expect issues. When you think about it, we just have a Linux machine acting as a router - which is what Linux does best. I know the Tailscale software is high-quality and performant. I’ll report back with results in the future.
drio out.